Open studio is for adults currently enrolled in classes. You cannot bring guests to use the studio. Please only use equipment that you have experience using/trained by your instructor. See Open Studio hours below. Please read our ceramic studio rules carefully.
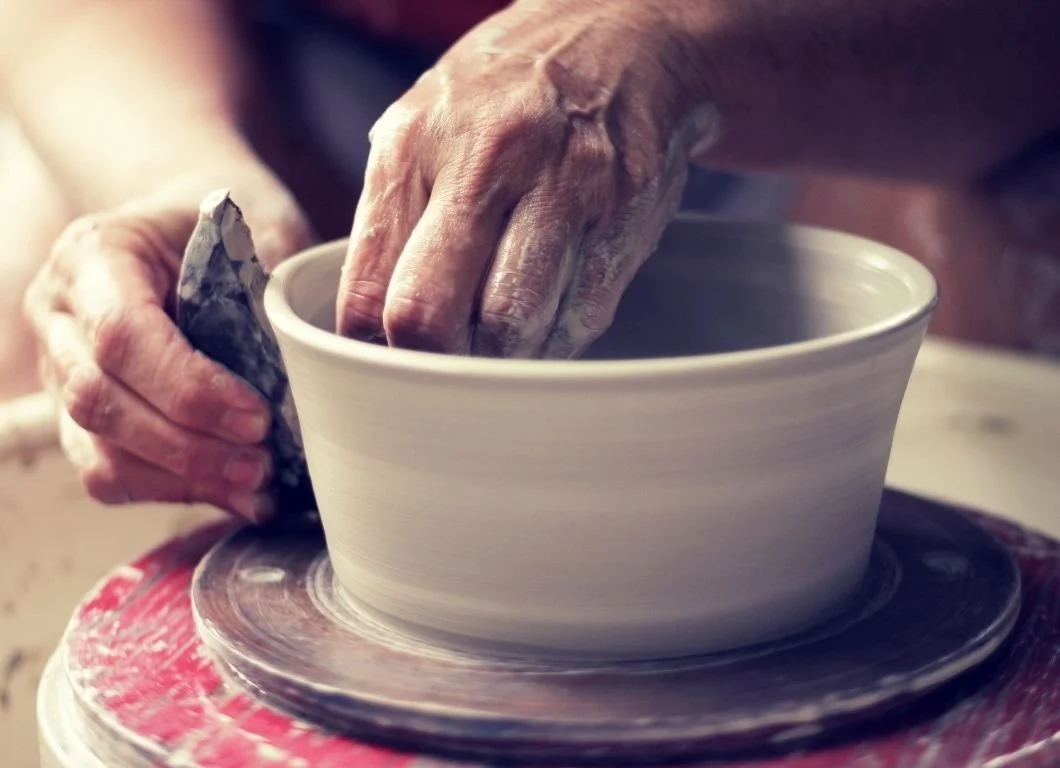
Our Ceramic Studio
-
Essex Art Center – Ceramic Studio
Open studio is for adults currently enrolled in classes You cannot bring guests to use the studio.
Please only use equipment that you have experience using/ trained by your instructor. Always vacuum or wipe clay scraps with damp cloth/ sponge, NEVER SWEEP. There is a mop system in the glaze room. Please mop up glaze droplets that drip on the floor after you finish glazing.
Storage Shelves: Each instructor is assigned a shelf. Please keep your pieces on your class shelf. If the class shelf is crowded, please ask your instructor for help to prevent damaging other student work. DO NOT PUT YOUR WORK ON ANOTHER CLASS SHELF. The Bisqueware, Finished ware, and Drying Rack in Glazeroom shelves are not storage shelves. Collect your work after they are fired, place them on your class shelf or take them home. WE ARE NOT ALLOWING STORAGE OF PIECES BETWEEN SESSIONS. We do a deep cleaning of the studio space for your health and safety during our breaks, therefore we need the shelves empty.
To ensure that all independent studies students have shelf space, we are allocating one shelf per student. Please write your name on a tag and attach it to your shelf with a binder clip. These items are located on the table in the Clay Annex. (Shelves are not assigned and it's first come first served.)
Tables: Tables are covered with cloth to allow for easy cleaning. Please use the appropriate clay
body on the designated tables. White clay will stain if it is used on brown clay tables. To clean,
scrape the excess clay from the surface with a rib for recycling, and wipe the table down with a damp (not wet) rectangular sponge. (Not the small circular sponge – those are for throwing on the wheel); never brush dry clay off of the tables, that creates excess dust. DO NOT use a knife directly on the table. It will cut the cloth. Cut clay on ware boards or cutting mats instead.
Wheels: Please clean your wheel when you are finished. We should not be able to see which clay you have used. You may use a rectangular sponge and water, wipe down the wheel head, splashpan, and power on/off switch. Excess clay can be recycled. Also, clean off the purple tables beside your wheel.
Recycling Clay: Extra clay that has dried out/ or too wet can be reconstituted into workable clay. If your clay is dry, you can add water, too wet can be dried out, or the two can be wedged together. If your clay is too wet or too dry to wedge it needs to be pugged by a studio technician. We provide recycled clay for the studio. Keep the brown and white clay separate. Underneath each wedging table is a black bin. Place clay in a bag before placing it in the bin to reduce the creation of dust.
Tools: Please scrub clean your tools with water in a bucket of water before putting them away.
Don’t leave the water running from the faucet. Use the water in the sink with the basin to do a “rough clean” of your tools or work area. Only use clean water for the final “rinse”. NO CLAY DOWN THE DRAIN. Check the bottom of the sink for tools. Also rinse clean large rectangle sponges after cleaning tools and table. Heat Guns are no longer being used in our studio due to improper use. There are several wheel bats that are now warped/ damaged.
Plastic: Cover your pieces with plastic when you are finished with them for the day/night, and when you want them to dry slowly. Put your name on a piece of masking tape, and tape it to a ware board and plastic. Roll up plastic and place in the appropriate bin. Plastic stained with Brown claymust go in the bin labelled “Brown” etc.
Ware boards: Please store your pieces on ware boards. Don’t use a big board for a small piece. Cover them with plastic and put them on your classroom shelf. When you are finished your piece remove it from the board and clean before putting it away. Many times, the board isn’t washed and the next person has to wash it prior to using it.
Respect the firing schedule: Plan projects accordingly to allow for sufficient dry times to accommodate bisque and glaze firing schedules. RULE OF THUMB: The last day to make anything new/ greenware is the 2nd to last class. Signs will be posted on greenware shelves as the session goes on. Talk to your instructor about your project to ensure enough dry times so we may accommodate what you’d like to make. Large, and/or flat pieces may take longer to be fired as they use a larger portion of the kiln. PLEASE, never move any other students' work to fit your pieces on the to be fired shelf. The clay technician will load pieces as they are ready for firing by size and how dry they are. Don’t forget to sign your pieces before they are fired so you can identify them later.
NO STUDENT SHOULD BE UNLOADING KILNS.
Bisque Firing: This is the first firing the clay goes through. It turns greenware into hard clay that glaze can be applied to. Before putting on the greenware shelf, ensure all foreign matter is removed (hair, pieces of sponge, newsprint, plants, etc.) Work cannot be over 1” thick. Water in clay that is too thick will not evaporate, and thus might explode in the kiln. Ask your instructor for help if your pieces seem thick, to find the best way to thin them out. Also have your instructor place a large flat or fragile piece on a broken or small kiln shelf. If it is difficult to transport while wet it will also be much harder to load and much more fragile when bone dry.
Slow Dry Section: Next to the greenware shelf is a section for pieces that are completed, but need to be dried out slowly: ie sculptural pieces. This is not a storage shelf. Once your pieces are warm to touch YOU have to move them to the greenware shelf to go through the Bisque/1st firing. It isnot the responsibility of the studio technician to monitor your work.
Glaze firing: This is the second firing for the clay. We apply glazes to our bisque pieces by painting, dipping, pouring, spraying, etc. There are many design possibilities for decoration. Your instructor can guide you on application processes, and it’s a great idea to look online or in books and magazines for inspiration. Please allow 1 - 1.5 weeks for pieces to be completed. Large flat slabware, tall or large pieces take up a lot of space in the kiln. These pieces may take longer to get into the firing. Make sure that the bottom of your pieces are clean/ free of glaze. They will fuse to the kiln shelf during firing if you don’t. The studio technician will not fire any pieces with glaze on the bottom and they will be placed on the reject shelf. You must wipe off glaze up the vertical side of your piece at least 1/8” (1/4” is even better on thicker pieces). Glaze is fluid during firing and can run down the side of your piece. Pieces that have too much glaze on them, glaze flaking off the surface, and/ or glazed all the way to the bottom of the piece will also be placed on the reject shelf. If you need to put your pieces on a stilt also place them on a cookie so not to shift their position before they go into the kiln. Your instructor can help in this process. The studio technician will only refire pieces once for touch up. More than that you risk overfiring pieces.
Glaze Room (Chimera): We now have a designated space just for glazing. Glazes for dipping arefound in containers along the wall and some of our more frequently used glazes in barrels on wheels are located underneath the glazing table by the windows (there are large paddles by the sink to mix these). If a glaze seems too thick or thin after mixing please inform the ceramics studio manager. DO NOT ADD WATER TO GLAZES OR UNDERGLAZES. Clean tools in the mystery glaze bucket before rinsing in the sink and putting them away in appropriate containers. Clean glaze residue off of table tops and mop up glaze droplets on the floor after glazing.
Wax Resist: If you are using wax resist on your piece you must wait at minimum 15 mins before dipping to ensure the wax is dry. Be mindful not to contaminate our glazes; the wax will cause glaze defects. Clean wax filled brushes with hot water and soap in the SINK ONLY.
Mystery Glazes: We create these one of a kind limited edition glazes from the sludge from the bottom of the mystery glaze cleaning bucket. Do not clean wax brushes in this bucket.
Underglaze: can be bisqued, glaze CAN NOT go in bisque firing. Absolutely No Stroke and Coat in the Bisque firing. Pieces are often stacked and placed close to each other in this firing. You will ruin your peers' work. NO ADDING WATER TO THIN OUT UNDERGLAZE IN JAR. It causes underglazes to spoil! If you desire a thin application put a small amount of underglaze on a palette and add water to it there.
Spray booth: Glazes can be sprayed using our spray booth. The instructions are on the side of the booth. Please refer to them to apply the glaze and then to clean up after yourself. It might sound labor intensive, but it ensures all of our equipment will be in good working order for the next student. ONLY USE AFTER PROPER GUIDANCE FROM INSTRUCTOR. Do not change/adjust the gauges.
Notebooks: A great idea is to keep a notebook handy, and take notes, sketch ideas of what you’d like to make. Take pictures with your phone of other people’s pieces, go online with Google, Pinterest, and YouTube. They’re vast informational resources you may take advantage of……and they’re free! Think and plan before you make!
Dress appropriately: We are a clay studio. It’s messy. We have aprons, but understand that you might stain your clothes.
Clay: Your instructor will give you access to communal clay (recycled or new) during class time. During open studio time you may use any of the clay under the wedging table. Always close the bag properly with a rubber band, so that clay does not dry out.
-
Students are permitted to bring in outside glazes and claybodies, but they must be
approved by the ceramics studio manager first. All new clays and glazes must be
fired on a cookie (flat piece of un-glazed bisqueware). View it as, you are becoming
familiar with the products and are still learning what your possibilities and limitations are.
This ensures that you are not damaging our kilns and other student’s work.
Criteria all Clays and Glazes must fire to Cone 5. (products that say range: cone 4-6 are
safe to fire)
Extremely Important!
If the number contains a 0 (zero) in front of it: example 05, then that indicates it is
low-fire. No low-fire clays or glazes are permitted in the studio. These materials
will melt/ liquify and ruin the kiln as well as other student’s work.
Below are the clays that our studio offers:
266 Umbria ^4-5
Standard Clay Company
Description: Mid- Fire Clay. Gives a reduction-like dark brown color in an electric kiln. Smooth
and plastic. Good for all techniques. Contains Manganese
Shrinkage: 12.5%
Absorption: 1.0%
Safety Data Sheets
https://cdn.shopify.com/s/files/1/0039/8177/0841/files/sdsnew266.pdf?v=1677861213
Liz Light White ^5-6
Sheffield Pottery Inc
Description: Mid- Fire Clay. offering a white background for intensifying various glaze colors.
The clay is suitable for wheel work. It performs very well under extreme demands of Raku, and
pit firing, having smooth, plastic handling properties. When “leather hard” it offers a smooth
surface for trimming. This distinctive clay is recommended for hand building techniques using
coil, slab, and press molding construction methods. Contains Molochite (porcelain grog)
Shrinkage: 12.0%
Absorption: 1.9%
Safety Data Sheets (please contact distributor directly for this information)
https://www.sheffield-pottery.com/products/liz-s-light-white-stoneware-c6-clay-w-grog-mc121700
m/?expa
_
m=categoryLocated in the Glaze Studio you can access the Safety Data Sheets binder. It contains
information on all of the raw materials we have in our studio space. Note: Not all
material is used in our glazes. If you would like to know specifically what is in a
particular glaze you are using, contact the ceramics studio manager:
Open Ceramic Studio Hours
During class time, students are not allowed to work in the main ceramic studio. Also, during the active class time the class in session has priority to the glazing studio. IF AN INSTRUCTOR IS TEACHING GLAZING, YOU HAVE TO LEAVE THE GLAZE STUDIO.
Independent Ceramic Studies Summer26
Jul 13, 2026 - Aug 22, 2026
closed: the following weeks youth are in main ceramic studio and adults can not be in the main studio during these times
July 27 - 31, 9am-12pm + August 10 - 14, 1pm-4pm
also closed the following two Sundays: July 12 + August 2
HOURS OPEN
Sunday: 12:00 pm - 4:00 pm, closed July 12 + August 2
Monday 10:00 am - 3:30 p
Tuesday not available
Wednesday 10:00 am - 3:30 pm
Thursday 10:00 am - 3:30 pm
Friday 10:00 am - 3:30 pm
Saturday 10:30 am - 1:30 pm
If you have questions, please email gwendolyn@essexartcenter.org